Seats & Harnesses
Seats & Harnesses
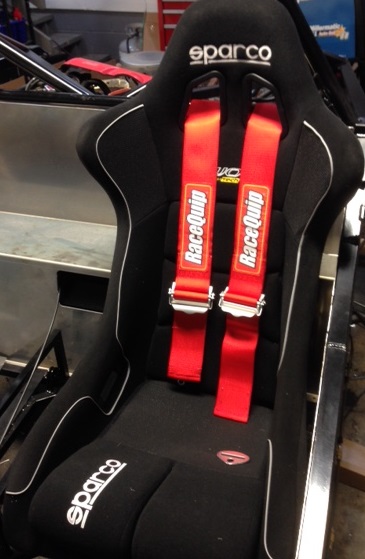
I am using Sparco EVO 2 seats. This is a slightly wider seat then the EVO seat. I am running this seat so that other people can drive the car as the standard EVO seats are for the smaller side of people. While I fit the EVO seat best, the EVO 2 still holds me in great even though I am a size 30 waist. Racing seat mounting points are a lot shorter than the stock seats so you will have to find a way to mount your seats.
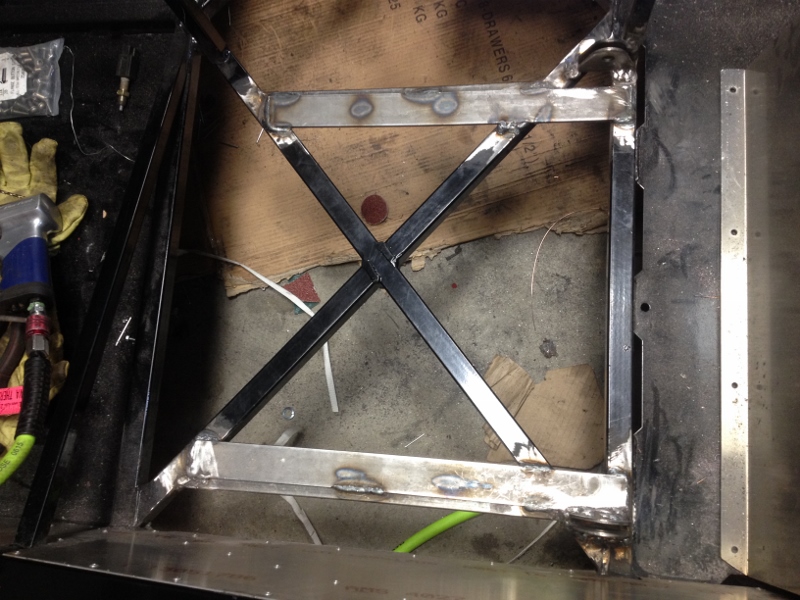
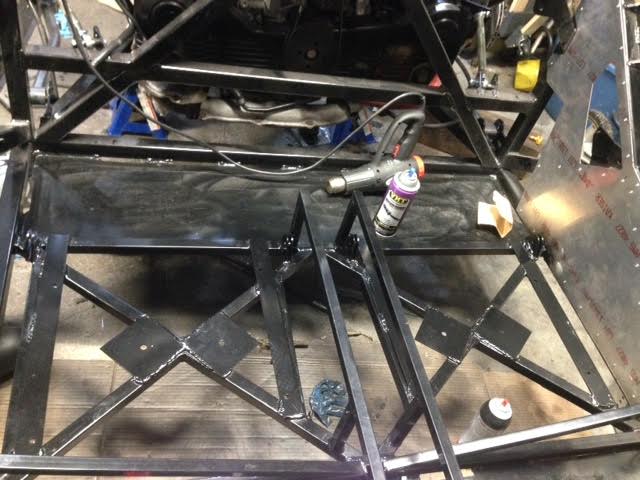
I’m a bit paranoid with the FFR standard mounting points. The stock set up uses the X frame with a big gap between the two points. I felt that there should be a support beam installed between. While my set up turned to be a little over the top, I feel better about it. Every seat is different so I recommend you take plenty of test fittings to know where to mount everything.
This is a DIY section only if you can weld :(.
- Seat mounts
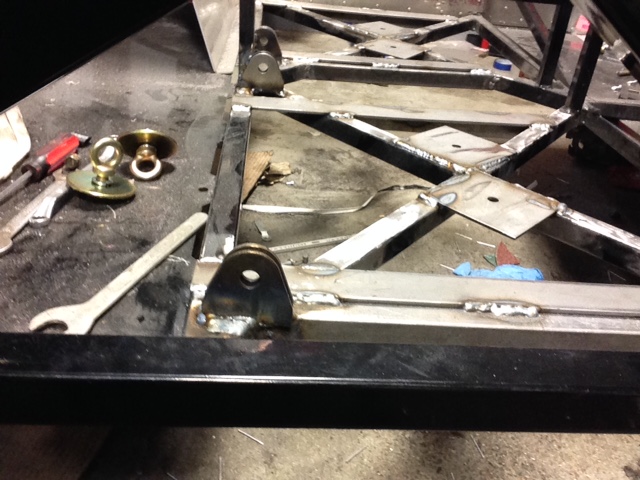
- I installed a tube/bar that is the same size as the frame bar sizes. I installed them between each X. Grind all paint off and weld it in, you will want one on each side.
- Hollow tubes with bolts through them are not a very nice structural design for seat mounts unless you put a cylinder inside the tube. I also rather not have any bolts under the car. I welded a solid flat bar of steel on top of the structural support. Having the center support tube/bar should help prevent the flat bar of steel from bowing in the middle from no support over time.
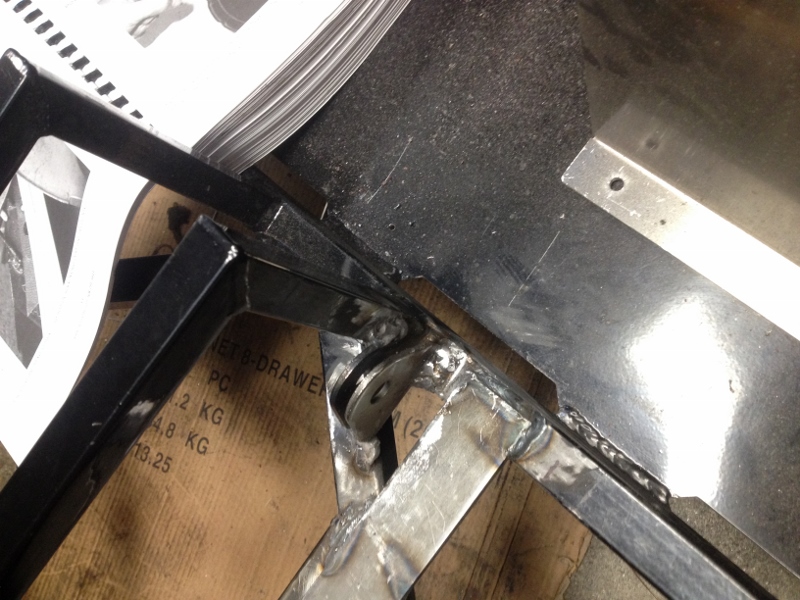
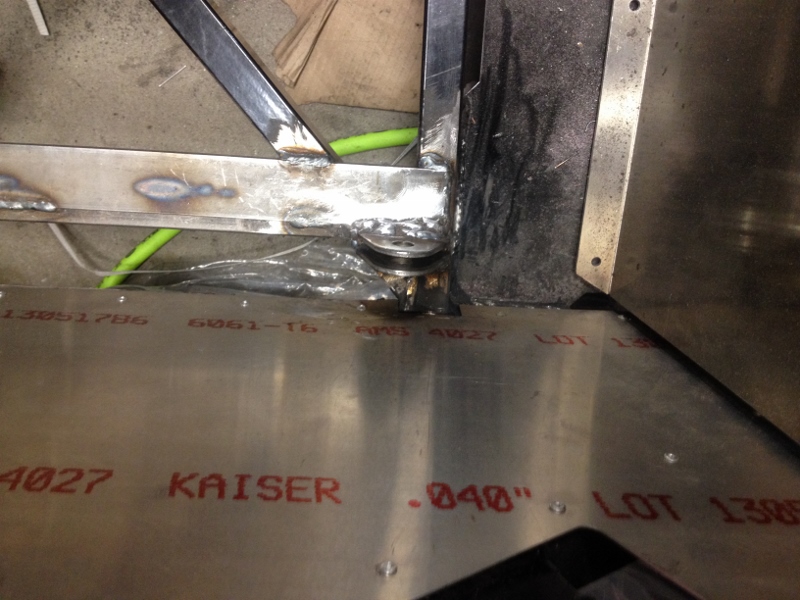
- After this you can drilled each flat bar with a hole on each side for the seat mounts to bolt into. I did this step last right before I painted everything. See image below for the holes after being painted. I used planted racing aluminum side mounts.
- I installed a tube/bar that is the same size as the frame bar sizes. I installed them between each X. Grind all paint off and weld it in, you will want one on each side.
- Harnesses
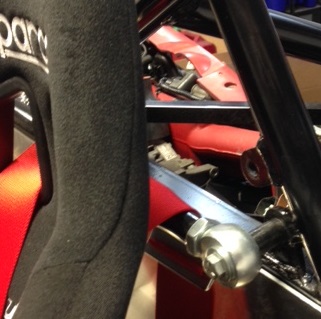
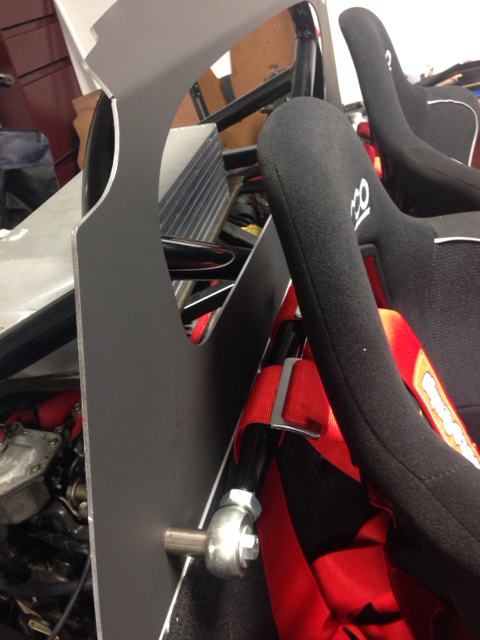
- I used double sheer mounts for the lap belts as they provide ability for the belt to pivot as needed as well as provide more surface area for weight distribution in the event of an accident. I used single tabs for the shoulder belts as they don’t need to pivot. Originally I planned to use the FFR harness bar, but it seemed to be configured to high to be safe.

- Boost the cat is a harness installation professional, while most don’t have access to a pro like boost, I highly recommend you follow the directions schroth has published.
- Lap belts
- I installed the lap belts as shown below, notice I welded the inner belts to the frame and the center console frame. Using the center console frame is a little over board, but why not!
- I did the same on the passenger side as well.
- I installed the lap belts as shown below, notice I welded the inner belts to the frame and the center console frame. Using the center console frame is a little over board, but why not!
- Sub belts
- 6 point belts are the proffered belt for most tracks, studies have shown 6 point harnesses to be safer in an accident compared to a 5 point. I installed my sub belts as follows below.

- Because of the 818’s design, the seats do not sit 100% even so the sub belts will be uneven when you install them meaning that one belt will be longer then another. I talked with Schroth about this. They said it is fine so long as the mounting point distance is 6 inched apart from each mount point and the belt is even after being adjusted on each side to compensate as needed.
- 6 point belts are the proffered belt for most tracks, studies have shown 6 point harnesses to be safer in an accident compared to a 5 point. I installed my sub belts as follows below.
- Paint your welds so they don’t rust. I used VHT suspension paint it seems to match the FFR powder coat well.
- Shoulder harnesses
- I ended up having to throw out the FFR harness bar. I cut the bar according to the instructions so that it would fit the FFR/OEM mounting holes. After realizing that the bar sat to high the damage was done and the bar just didn’t provide enough thread to be satisfied on my new mounting holes. I upgraded to a 1.25in harness bar since I needed a new one. Bigger bar should provide a little bit more surface area for the belts as well. The FFR bar seems a little bit small. If you plan to lower your harness bar do not cut it!
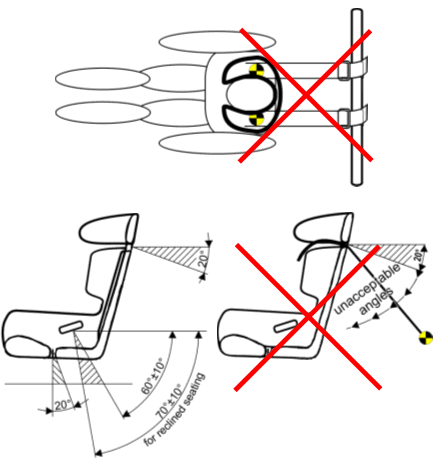
- FFR Shoulder harness bar tends to sit up to high for most people. I found for myself the harness ends up sitting up at a positive angle which based on most directions this is not recommended. You want a 0 deg to negative 20.
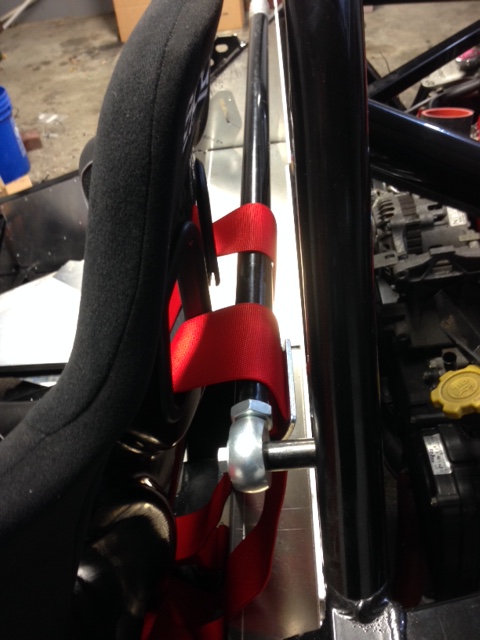
- I had to solve this by creating lower mounting points. FRR seems to have maybe fixed this issue on all newer models with the changed mounting points, however for the older 818 you will want install the mounts lower. I installed mine as shown:
- With the bar lower I was now at a nice negative deg once I sat in the seat yay!
- I used double sheer mounts for the lap belts as they provide ability for the belt to pivot as needed as well as provide more surface area for weight distribution in the event of an accident. I used single tabs for the shoulder belts as they don’t need to pivot. Originally I planned to use the FFR harness bar, but it seemed to be configured to high to be safe.
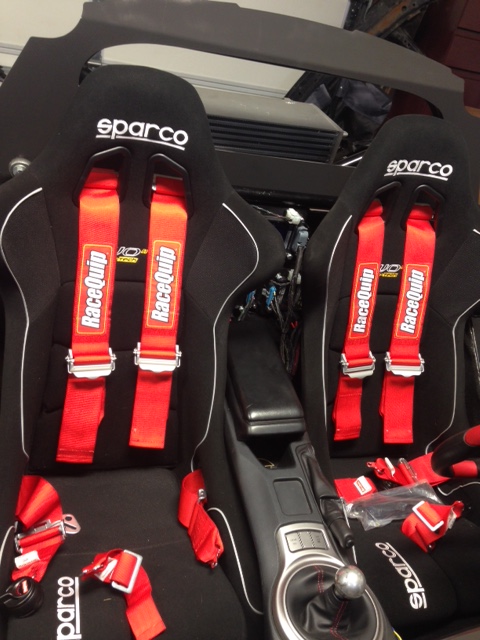
- Both seats fit perfect in the car and cleared just enough to fit everything that I wanted.
- For the 818C folks you will need to drill holes to mount the harness bar and the rear window cover.